

I'm back + My Everyday Makeup Tutorial!
Hey guys! As promised, I'm back with a long awaited tutorial: My Everyday Makeup!I don't wear makeup literally everyday. By everyday I meant when I actually go outside my house or my usual makeup. n_n
[This post is picture-heavy]
This is the final look:

So let's begin!
1.) First you wanna start off with a clean face. Use toner and moisturizer regardless of skin type. Even if you're oily-skinned like me, don't skip the moisturizer! Just stick to moisturizers with light formulas and ones that gets absorbed easily. ^_^

I actually have pimples on my cheeks right now >.<
2.) Squeeze out some of your BB Cream or Foundation onto the back of your clean hand and use your clean finger to dot it on your face such as your chin, cheeks, nose, and forehead. I can't stress enough that you should use clean hands and fingers so that you won't transfer bacteria onto your face and cause pimples! Anyway, using your brush, sponge, or fingers, gently spread your bb cream or foundation all over your face.

3.) With your leftover BB Cream or Foundation, dot it on your dark circles and gently pat it in an upside down triangle shape/area.

4.) With your favorite concealer, conceal your pimples/dark spots using your finger or a brush. Remember to blend out the edges to make it look natural and avoid concealing it too much to the point that you look like you have white bumps on your face. >.<

Don't forget to conceal any redness, especially around your nose for a more youthful look.

5.) Powder up! Again, do this in a patting motion instead of tugging/rubbing it on your skin, or else your concealer and base makeup is gonna be moved around in a horrible mess and you're gonna have to start over again. >.<

Next is your eyebrows! I personally prefer using an eyebrow pencil since it's easy + an eyebrow mascara although I ran out of it so I only have my eyebrow pencil T.T I'm using my EH Easy Brow pencil in Light Brown, I think. I have a review of it (in dark gray) here.

6.) Start by making an outline of your eyebrow shape/the eyebrow shape you want and filling it in by about 2/3 of your eyebrow, leaving the inner 1/3 as it is.

7.) Using the brush of your eyebrow pencil, blend out harsh edges to make it look natural, and don't forget to use the brush on the inner 1/3 of your eyebrow as well. It has some product on it and using it on the empty areas will result in a lighter application. ^_^

How it should look by now:

8.) Using a glittery flesh-colored (2-3 shades lighter than your skintone) eyeshadow, apply it under your eyes aka your aegyo-sal for volume and a more youthful, ulzzang-y look. ^_^

Result:

Eyeliner time! I apply eyeliner from the outer 1/3 of my eye. I'm using EH Oh M'Eye Line Eyeliner in brown. Review of it in black here.
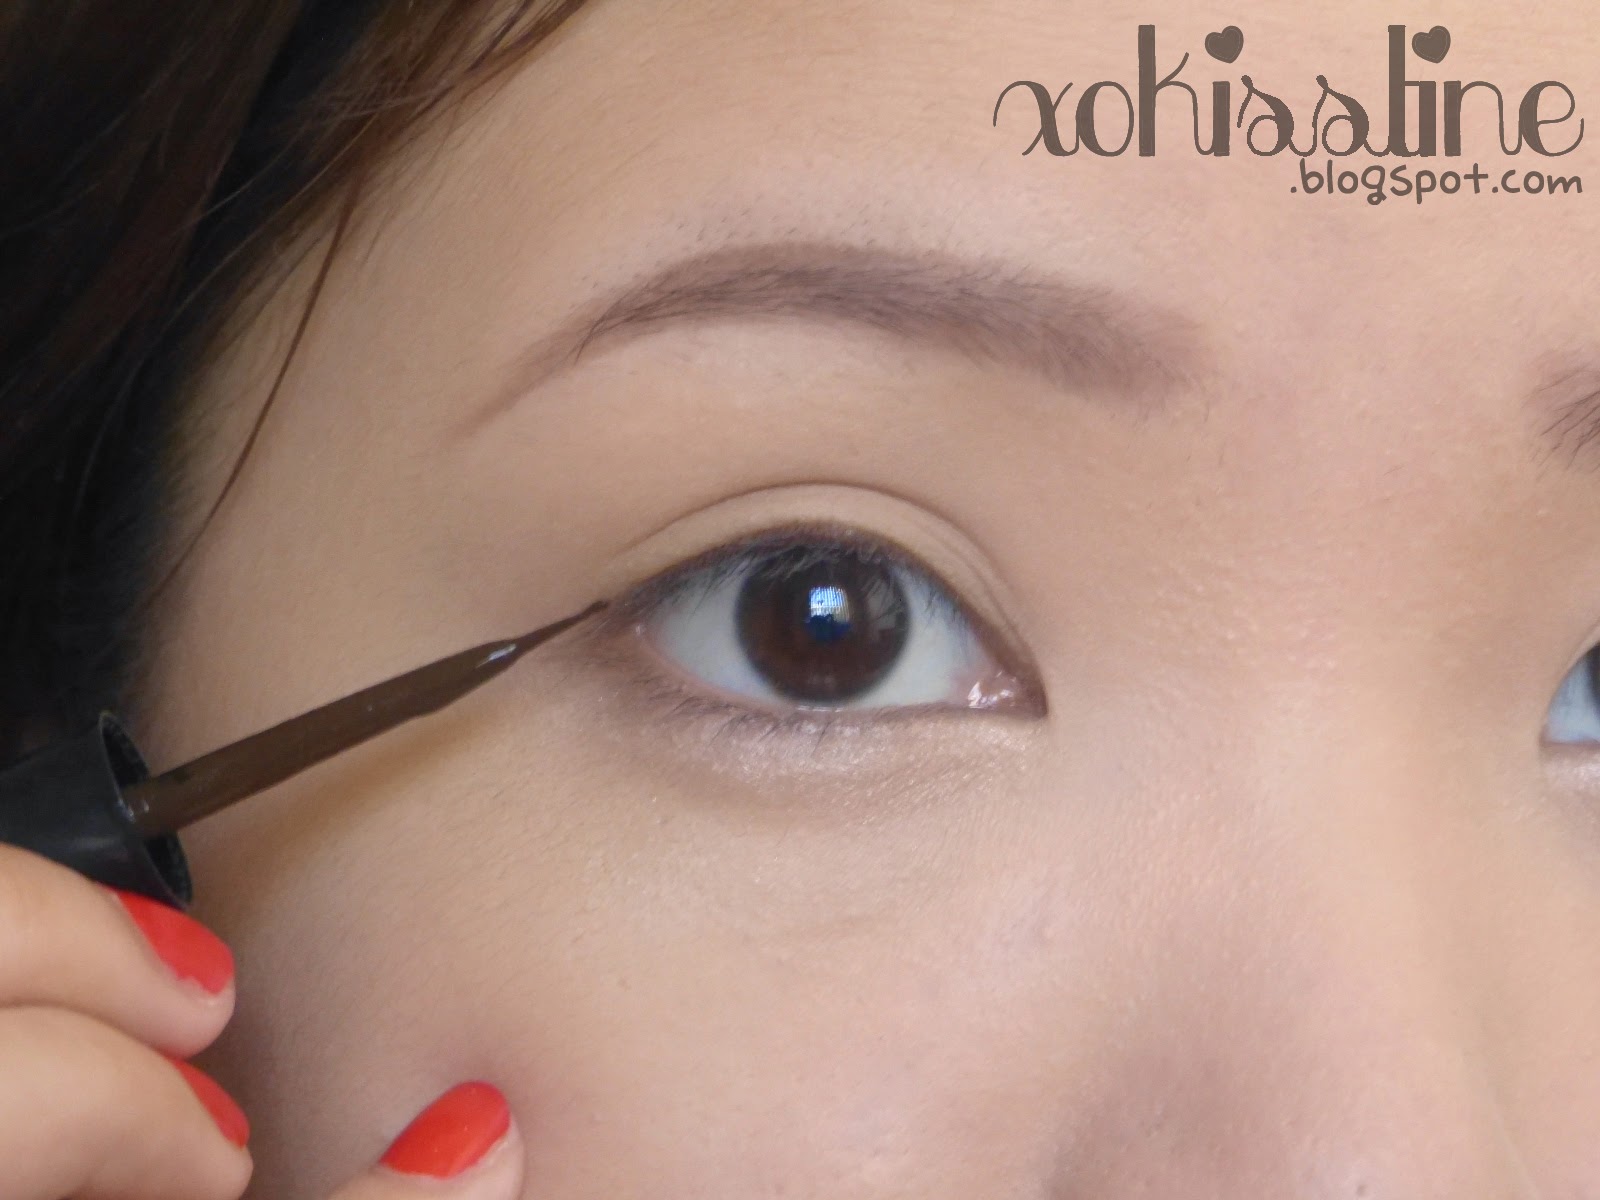
9.) Extend the line downward, following the natural shape of your eye. You can add a wing, but do it only slightly upwards.

How it should look:

10.) Curl your lashes!

11.) Apply mascara on your upper lashes! I'm using a different mascara as my favorite one run out which is EH Oh M'Eye Lash Mascara. Review of it here.

The look by now:

12.) Now it's time to add some color to your cheeks! Apply on the apples of your cheeks for a rosy, youthful look ^_^

Here it is:

13.) Ulzzang gradient lips time! Use a red or pink lip tint on the inner part of your lips. Sorry for the chapped lips >_<

How it should look by now:

14.) Using a beige or coral lipstick, apply it on the rest of your lips, avoiding the inner part.

15.) Last step is to add the same eyeshadow you used on your aegyo-sal/undereye area onto the bridge of your nose for an illusion of a taller nose. Koreans rarely contour their noses so they usually just highlight the bridge of their nose for a more natural look.

No need for plastic surgery!

Final look:

And that's my everyday makeup look! Hope you guys liked it ^__^
Here's a filtered one for the lolz


Hello Ms. Kristine can you make a video version of it?
ReplyDeleteSoon, hopefully. :)
Deleteayoooo!! angkyot mo :) please add more tuts
ReplyDeleteThank you! Yes, more to come soon!
Deletekyeopta!! hope you could add korean eyebrow tutorial. like ko yung eyebrow moooo especially when you already had your eyebrow liner. korean na korean na!!
ReplyDeletebtw, anong gamit mong eyebrow and what color? kamsaaa~~
oops sorry. i mean anong gamit mong eyebrow pencil hehehe
ReplyDeleteIt's stated in the tutorial^ together with a review link :) although mine is in light brown :) I also made an eyebrow tutorial na but it's not a Korean eyebrow tutorial. Hehe :)
Deletemianhe... di ko napansin haha! i was looking at your CUTE pics kasi eh.
Deletehow i wish you could show us how you straighten your eyebrows just like koreans.
omg you look so cute and your eye make up reminds me of IU's make up ^w^ I really love your eyes they're totally cute ;w;
ReplyDeletehttp://mymychen.blogspot.com/
Thank you ^__^
Delete@美美
Deleteactually, she cosplays IU here in the Philippines. They look twins right? :D
OH MY GOSH GIRL I DO THE SAME EXACT EVERY DAY MAKEUP. Dude this is crazy omg! Wow spot on though! Like I only put highlighter on my aegyo-sal region and nose bridge as well and omg wow. Haha you're really adorable btw ;-;
ReplyDeletewww.pinkivorys.blogspot.com
Cooool! It's really simple anyway ^__^
Deleteunnie, can you do a vlog? ahihihi
ReplyDeleteyeahh i also want to see her in vlog. <333
Deleteplease PH IU. :))))
Paano niyo po ba napapantay yung paglalagay ng liquid eyeliner? Dun po kasi ako talaga nahihirapan? BTW. Ang galing po ng mga tutorials niyo :) Looking forward po sa mga upcoming na gagawin niyo ^_^
ReplyDeleteHi unnie :) its me from the ulzzang dolly make up chuchu haha can you also make a tutorial para sa pagmamanage ng oily face omfg. Major stress kase. Ugh. So cute BTW. Nacoconyo ako shiz.
ReplyDeleteWhat eyeshadow are you using?
ReplyDeleteNaked 3 Palette from Urban Decay :)
Delete